Secondary tracks do not share the well maintained look of “out of the box” flex track. It’s relatively easy, if a bit laborious, to replicate this look.
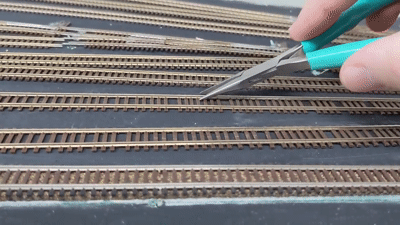
The first thing you’re going to have to do is cut the “web” between the ties that keeps them together and aligned. If you’re only doing a little bit it’s possible to do this with a knife, but when you have a yard full of it to do, investing in a NWSL Chopper or Micro-Mark Chop-It is going to save your fingers.
I used the card stock from a switch package under one rail to angle the track as I cut it. This was important because the chopper does not bring the blade down in a completely vertical motion and may not get through the web under each rail. This tiny bit of elevation brought things in line enough so my Chop-It could correctly get through both webs. I’m not going to lie, this process was tedious and time consuming, but worth it in the end.

I did not do the tie removal on the workbench because I didn’t want to be maneuvering big sticks of weakened track between it and the workbench. I tend to do a lot of fitting and assembly upstairs at my bench and the layout is downstairs.
That meant that I had to do the actual tie removal and re-spacing on the layout itself. This was accomplished by slightly lifting the track and just prying the ties off with some pliers. Manually catching each tie (for future use) was super annoying, so I placed a sheet of paper under where I was working to catch the ones I drop. Like I said, I usually remove every fifth or six tie, but as you can see in the photo below sometimes fewer, sometimes more. We’ll be redistributing the ties in a moment, so the current spacing is not important.

Once I’ve got the ties out and collected in my tie cup (made easy by the paper), I then need to spread them out. If I only had a few feet to do this could be done with much more attention to detail, but with a yard full I needed something quicker.
I run my pliers along the ties and things tend to spread out in a nice even, but irregular, pattern. Of course it’s easy to manually adjust any ones that you’re not thrilled with, but this gets you 90% of the way there nice and quickly.
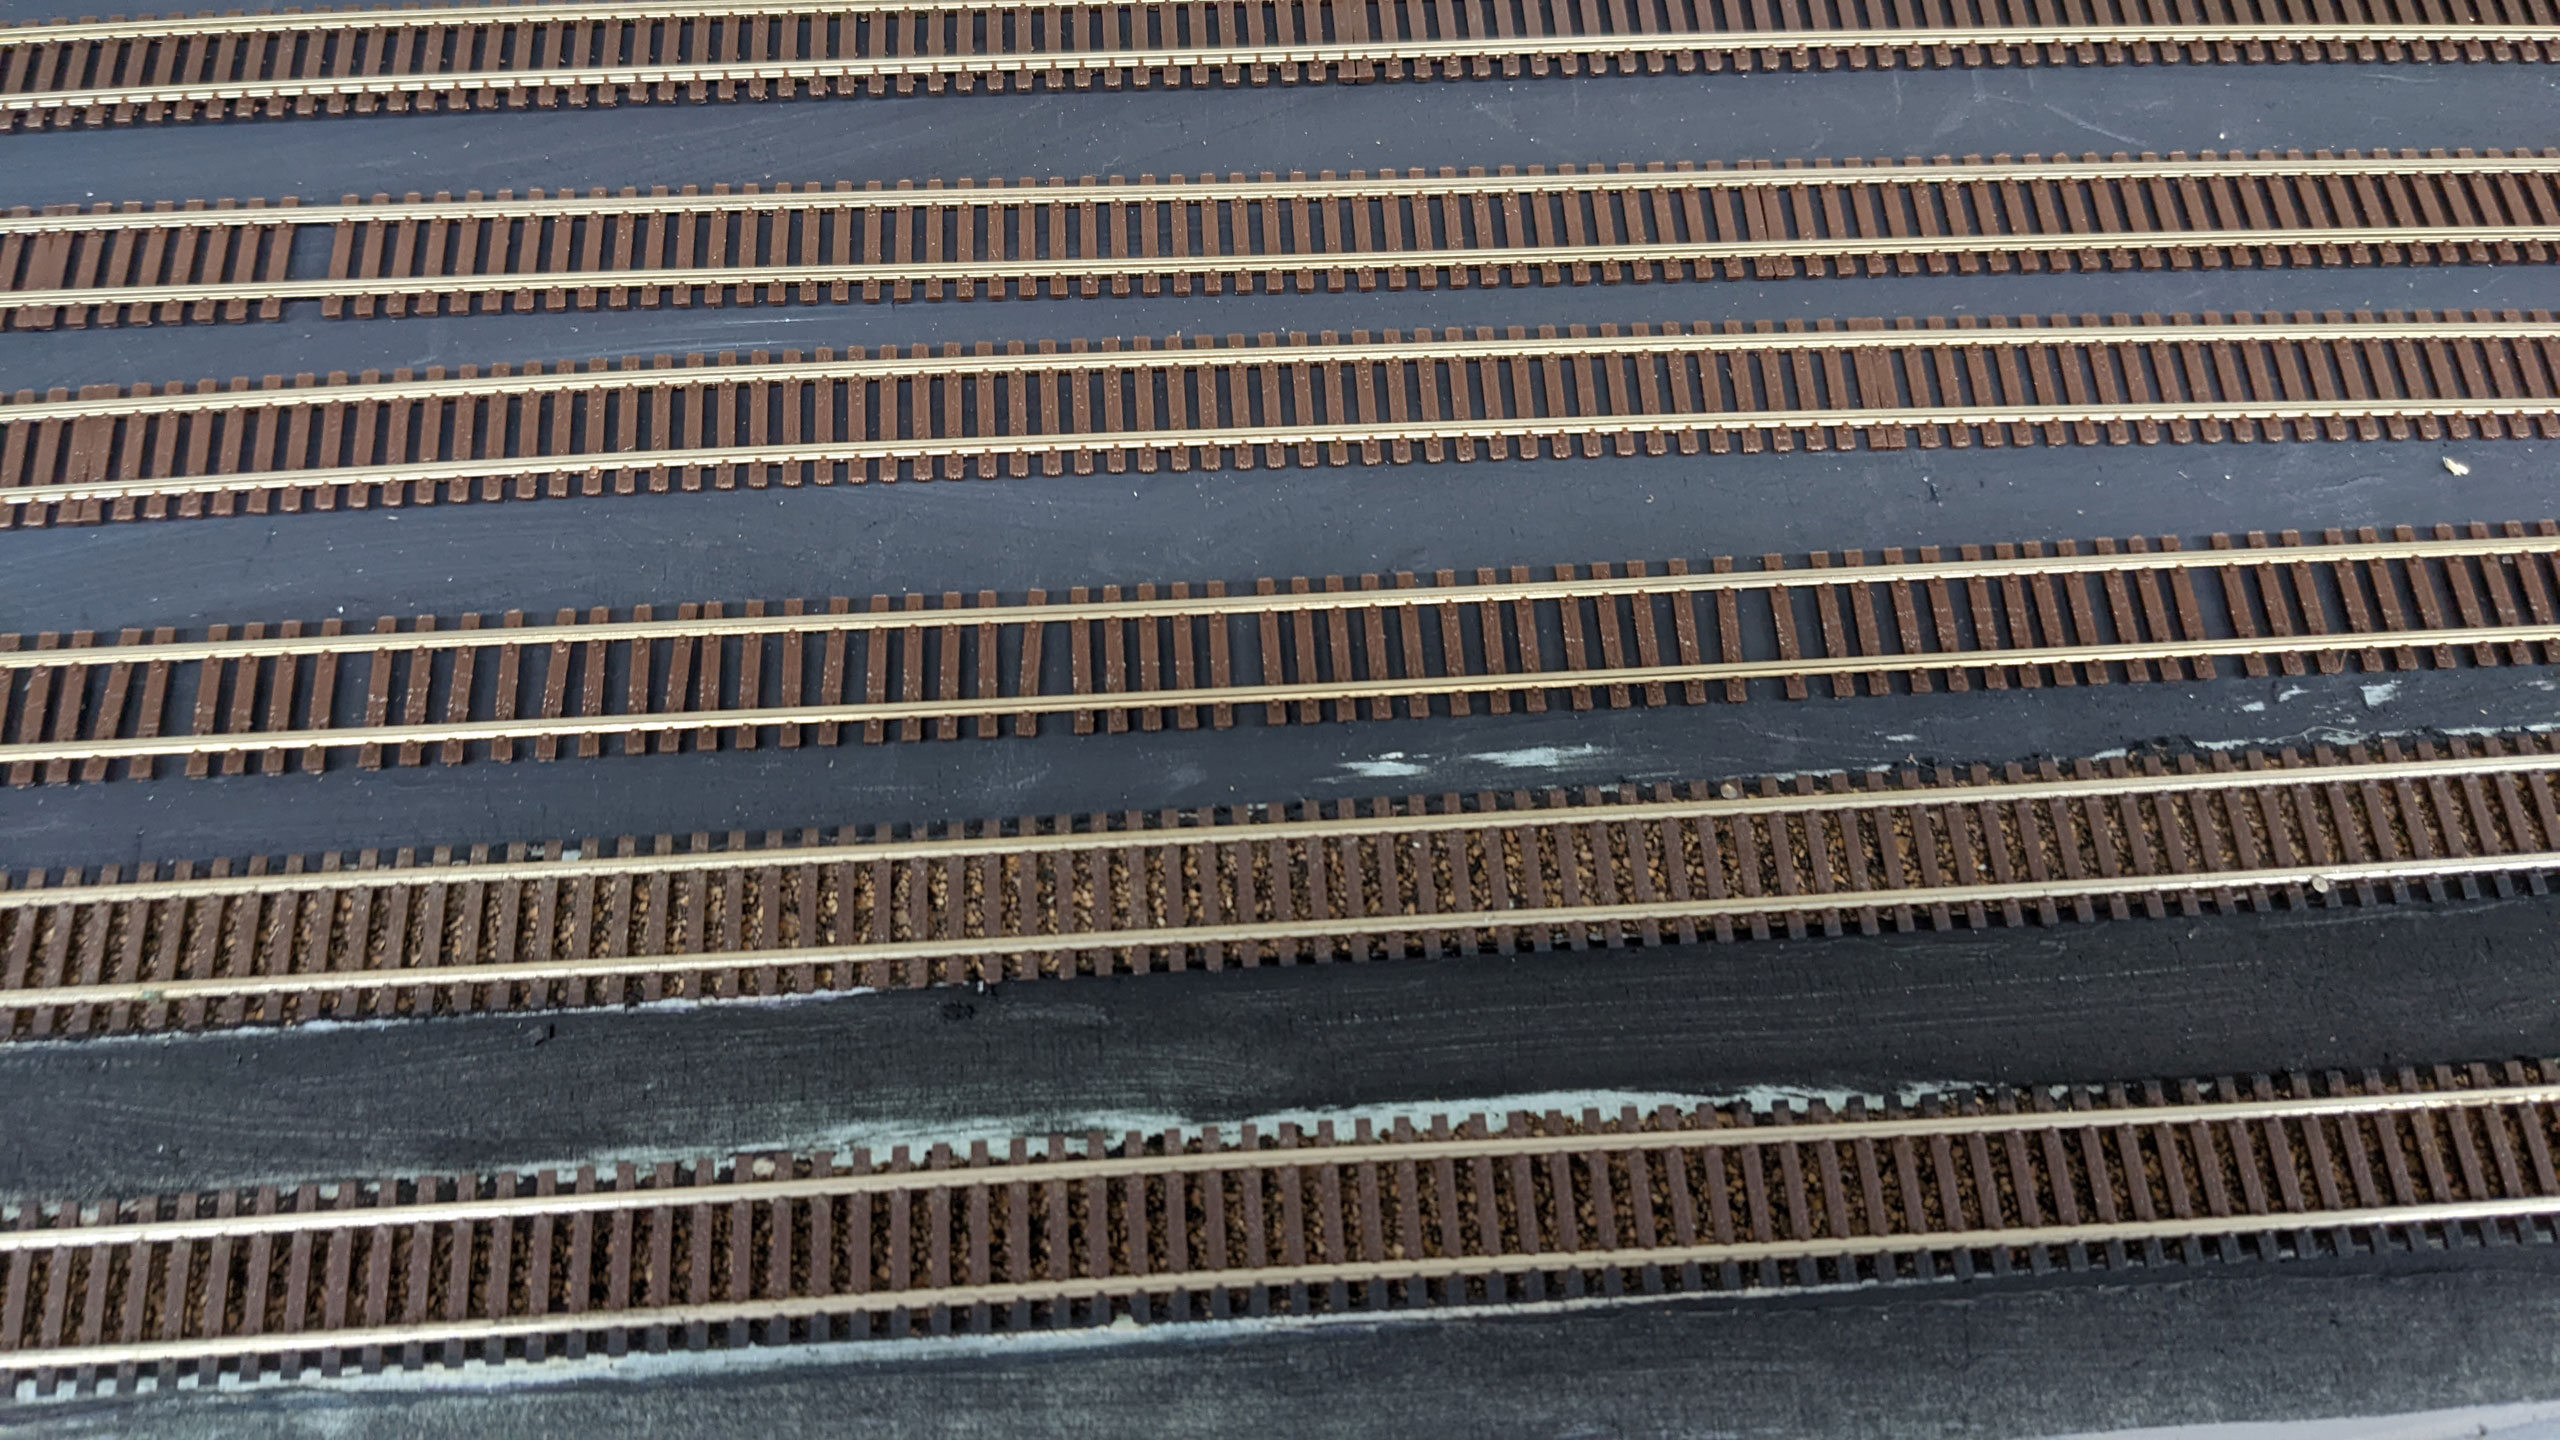
Here’s the finished product (the third track from the bottom) compared to unmodified mainline and yard tracks.
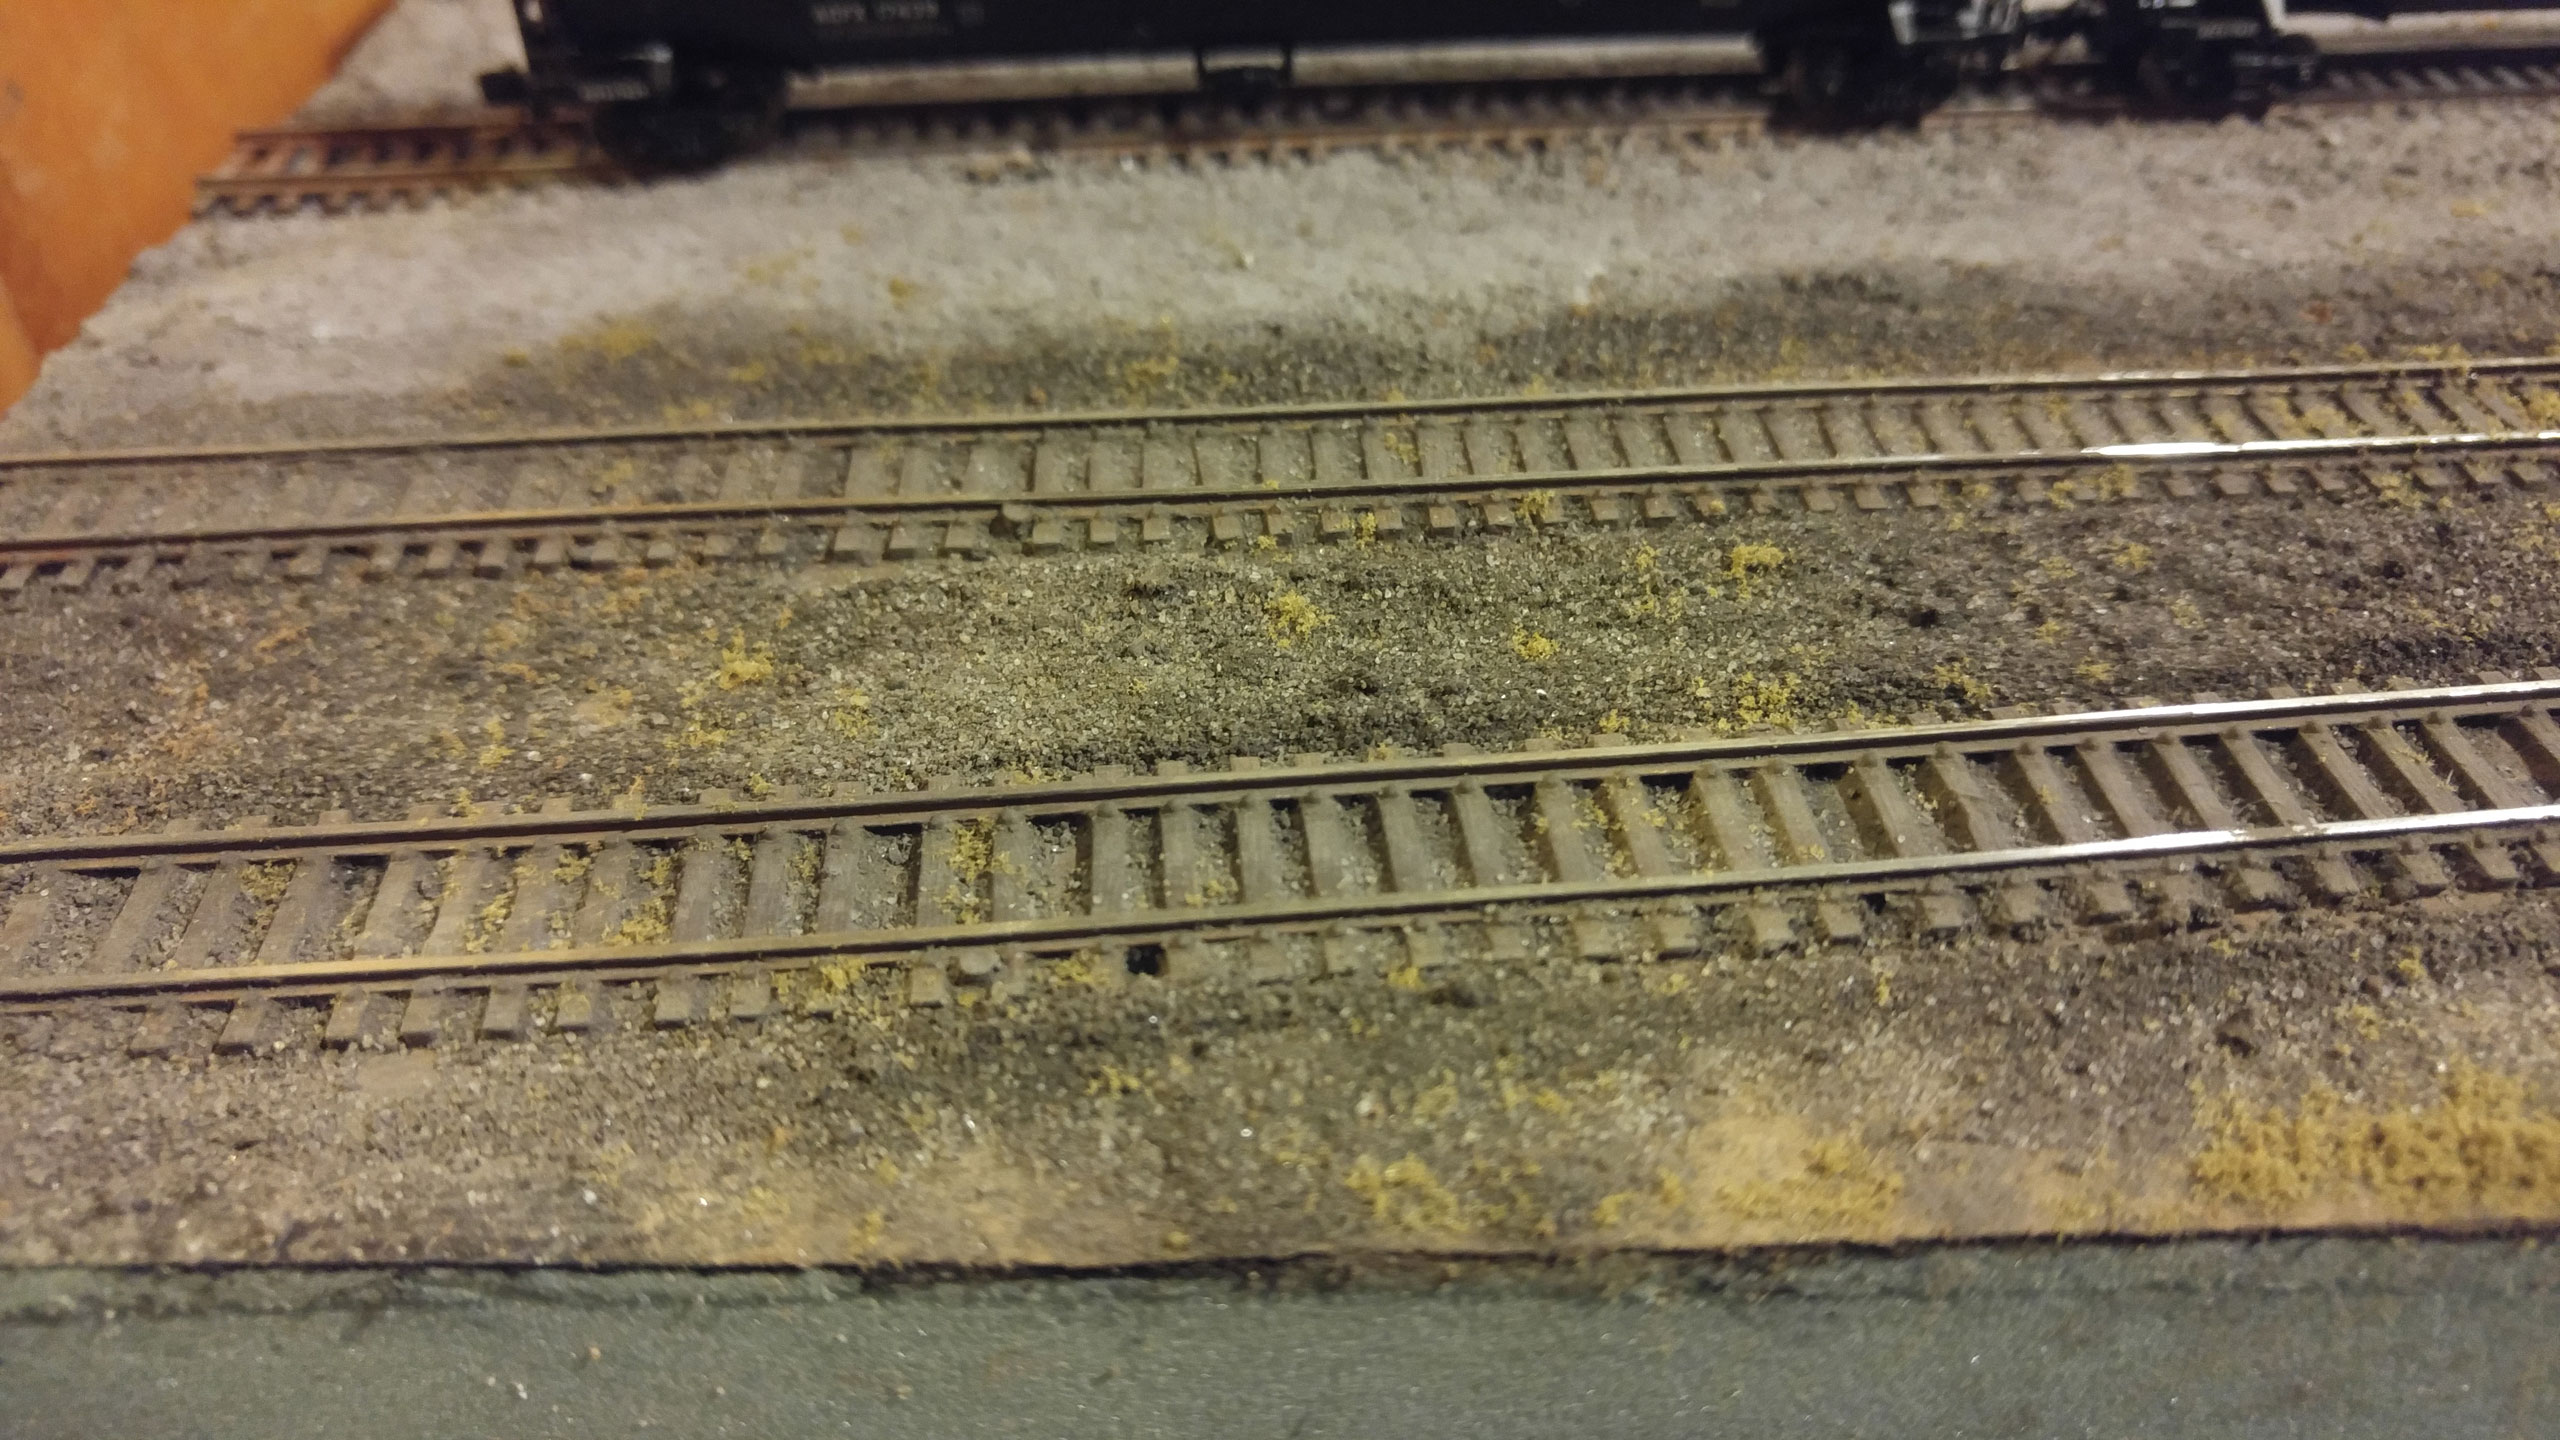
This is well worth the effort, as you can see from this photo from my old Windsor St layout.
One thought on “Improving Atlas Code 55 Track By Making It Look Worse”
Comments are closed.