Modelers, for years, have been looking for ways to replicate common every day things. Trees make up such a large part of the landscape that they are a frequent topic of discussion whenever the topic of scenery comes up.
Part of what fascinated me about modeling winter was the challenge that winter trees posed. Generally, most techniques that modelers employ are for trees in spring, summer or fall, when there are leaves obscuring the delicate, but hard to replicate, branch structure. Finding a way to replicate these branches was the first step in modeling winter trees.
Along the way, I came to two other realizations about trees that leads to, what I think, are much more realistic appearing model vegetation. These seem like common sense things, but they are often forgotten in the modeling community.
- Trees are tall
- Trees aren’t brown, they’re gray
Like I said, these seem like obvious things, but once you understand their significance, your approach to modeling trees must change.
For my winter trees, I use a very simple method that takes advantage of the wonderful “Super Trees” product from Scenic Express.
Super Trees are an organic product, part of a plant, that mimics the fine structure of real tree branches. They’re intended to be used with some sort of flocking, or leaf material, but I’ve found that left bare, they do a good job of creating a forest.
You’ll note that I did not say “trees”, but “forest”. Individually, the Super Trees don’t make perfect trees. Their general shape and “airiness” feels incorrect for the deciduous trees that are common in the eastern US, but when a number of them are put together, they result in an effective forest.
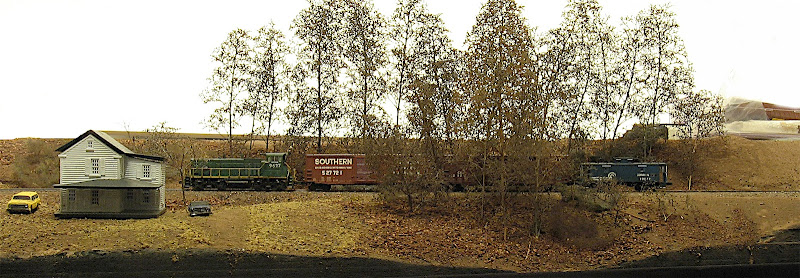
In this photograph you can see how the forest effect changes from from the single row on the ends to the center, where there are a number of trees deep.
The super trees work because of a few things. The first is their size. Each bag or box comes with a number of large pieces. These pieces form the large trees that create the core of a forest. Prepping these for use is very simple. The first step is removing them from the bag, roughly straightening their general shape by hand, and removing the “extras” in them.
These extras consist of two things, leaves and “balls”. The leaves are remnants of the trees former existence as a plant. They’re generally only a few per tree, at most, and are very easily removable with a quick pluck from a pair of tweezers.
Removing the tiny balls in the trees is a bit more difficult. These are small seeds (I believe) that are still in the branches. You don’t have to get rid of them all, but its worth briefly combing through the trees with your fingers to remove the ones that will easily fall out. I’d strongly advise doing this over a bag, trash can, or plate to catch them as they fall off.
The following photo illustrates the small balls remaining after painting in the tree on the right.
The single most important thing though, is picking out the tallest specimens in the bag to form the “core” of your forest. I generally select trees over 6″ for this role. This may seem excessive if you’re used to the normal undersized trees which N scalers have been using for years, but it will immediately add a great amount of realism to the scene. While having smaller trees, especially in the distance can add to a forced perspective effect, I believe that it’s largely ineffective because of the close proximity between the trains (the actors) and the trees (the scenery) on layouts. Another school of thought runs that the balance of tree size to equipment has evolved this way because it emphasizes the way that we perceive trains in real life. They appear massive, and that trees, because of their common nature, “recede” into the visual background, regardless of their actual physical size. There is much to be said for this thought, but I still believe that in order to build realistic looking scenery, the key is in accomplishing this same effect using other methods (color, texture, mis en scene, etc…) instead of changing the relative size of the elements, ie, the trees.
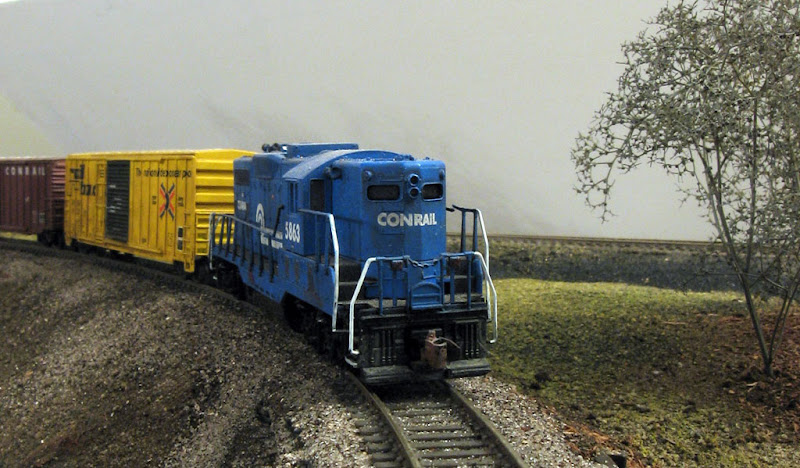
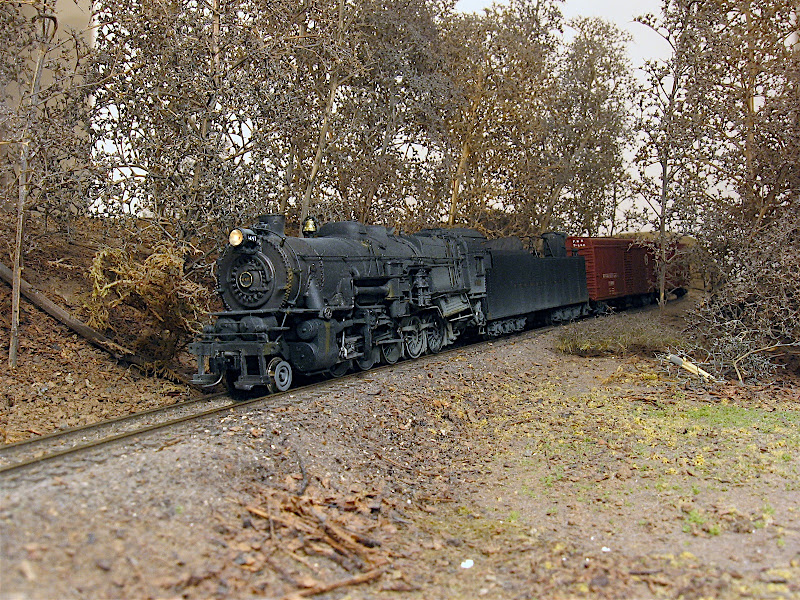
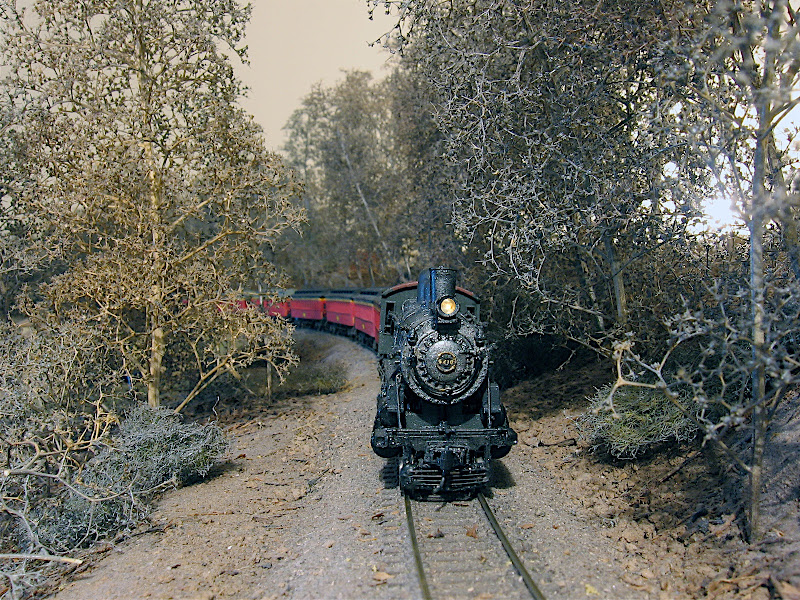
Look at how the trees tower over the trains in the following scenes. They’re generally at least four to six times the height of the equipment.


In the last photograph, also note the true color of the vegetation. From the time I was in preschool, I was always told trees are brown. It was while I was getting ready to paint my first batch of Super Trees and driving through the countryside that I realized the predominant color was gray. There was a hint of brown, but the trees and bushes were all gray.
At that point I realized that I needed to use gray primer as the base coat, then a light misting of brown to “warm” the trees up a touch.
Combining the correct coloration with the correct height Super Tree armatures has yielded me results that I’m happy with. I’m still on the lookout for better foreground trees, but when clumped together, these achieve the winter dormant tree look that I’m looking for.


One thought on “Winter Trees in N Scale”
Comments are closed.