I realized I should probably jot this down for anyone looking to model winter forests.
This is how I attack one of the most challenging aspects of modeling winter: forests.
Forest Floor
I’ll start with the forest floor.
Materials
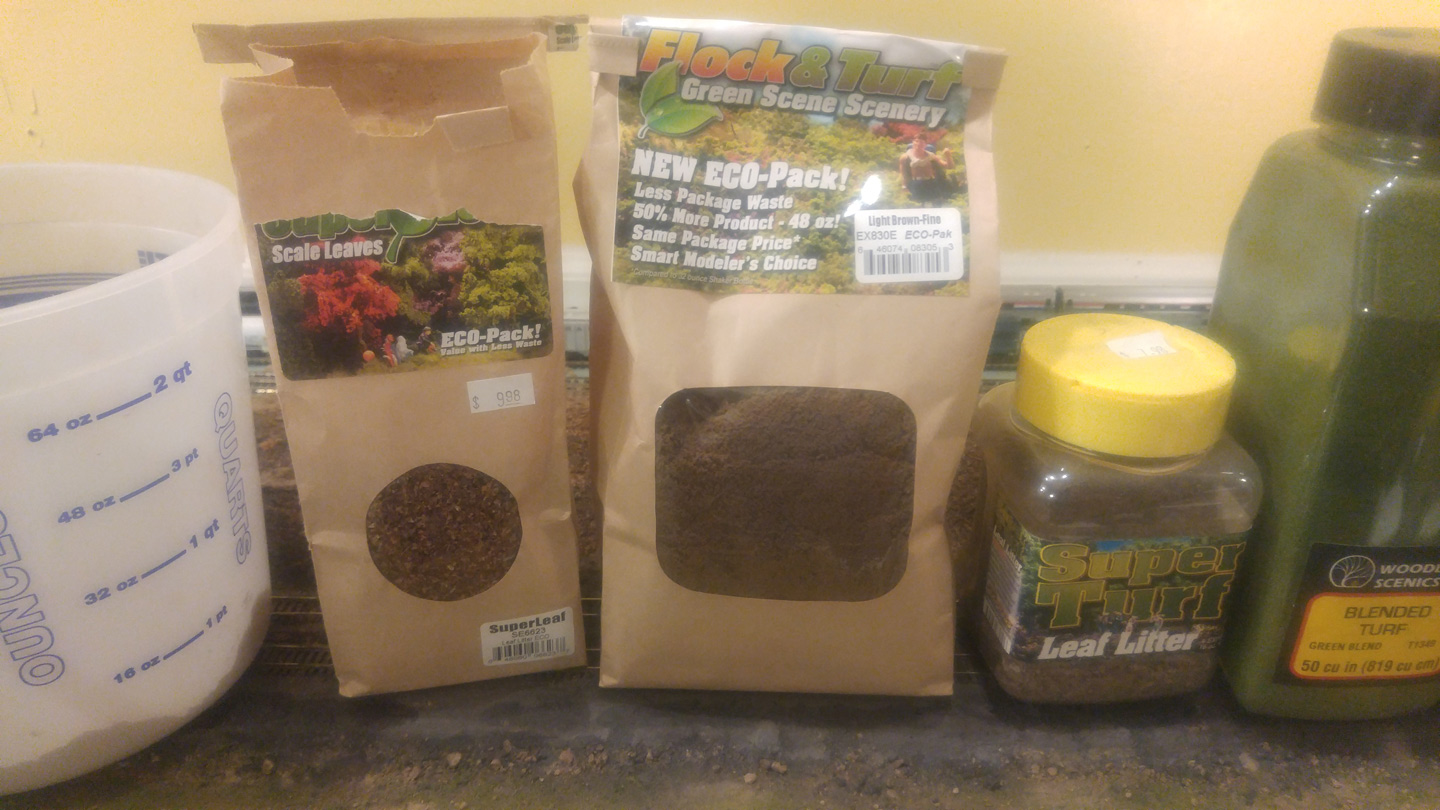
Scenic Express Leaf Litter SuperLeaf
Scenic Express Light Brown Fine Turf
Scenic Express Leaf Litter SuperTurf
Process
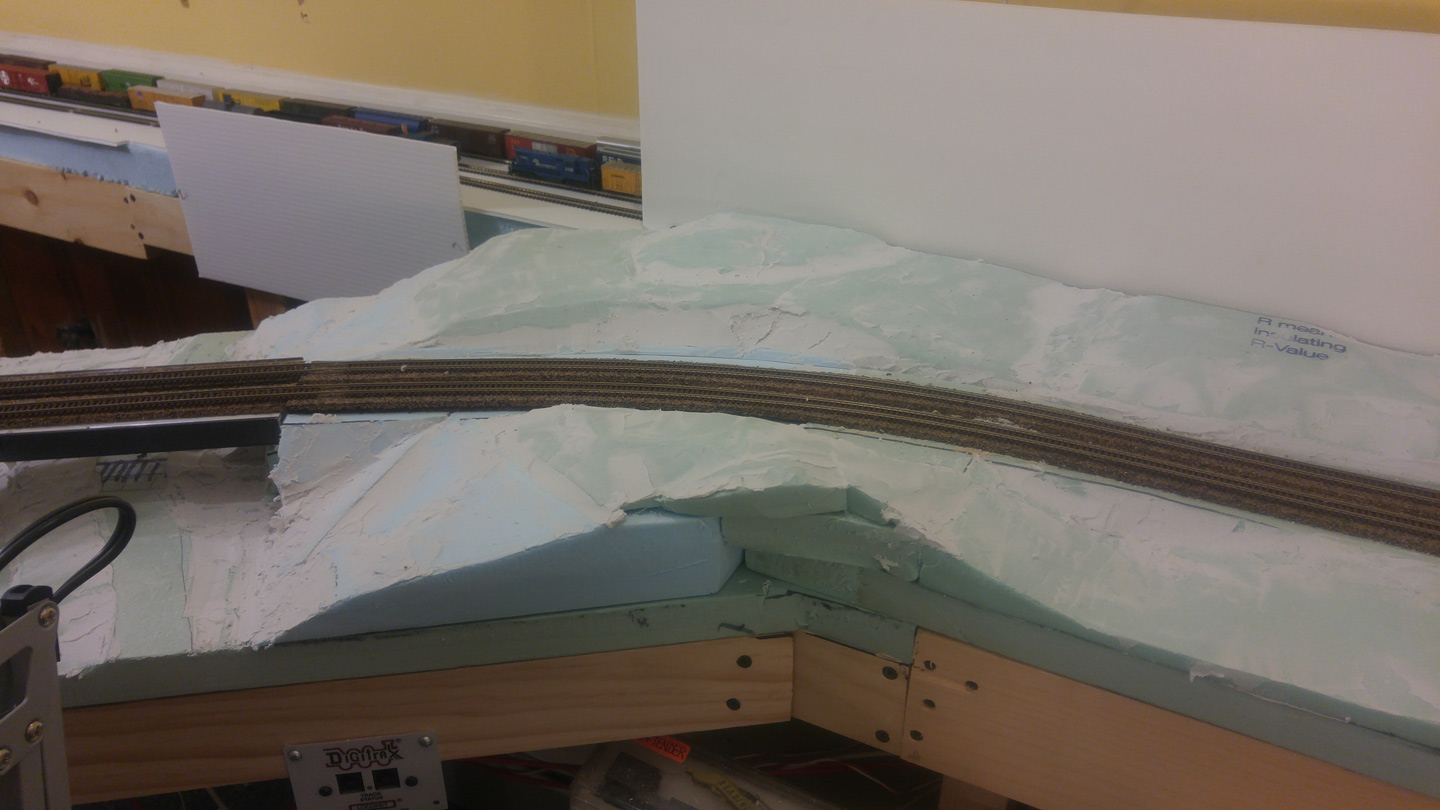
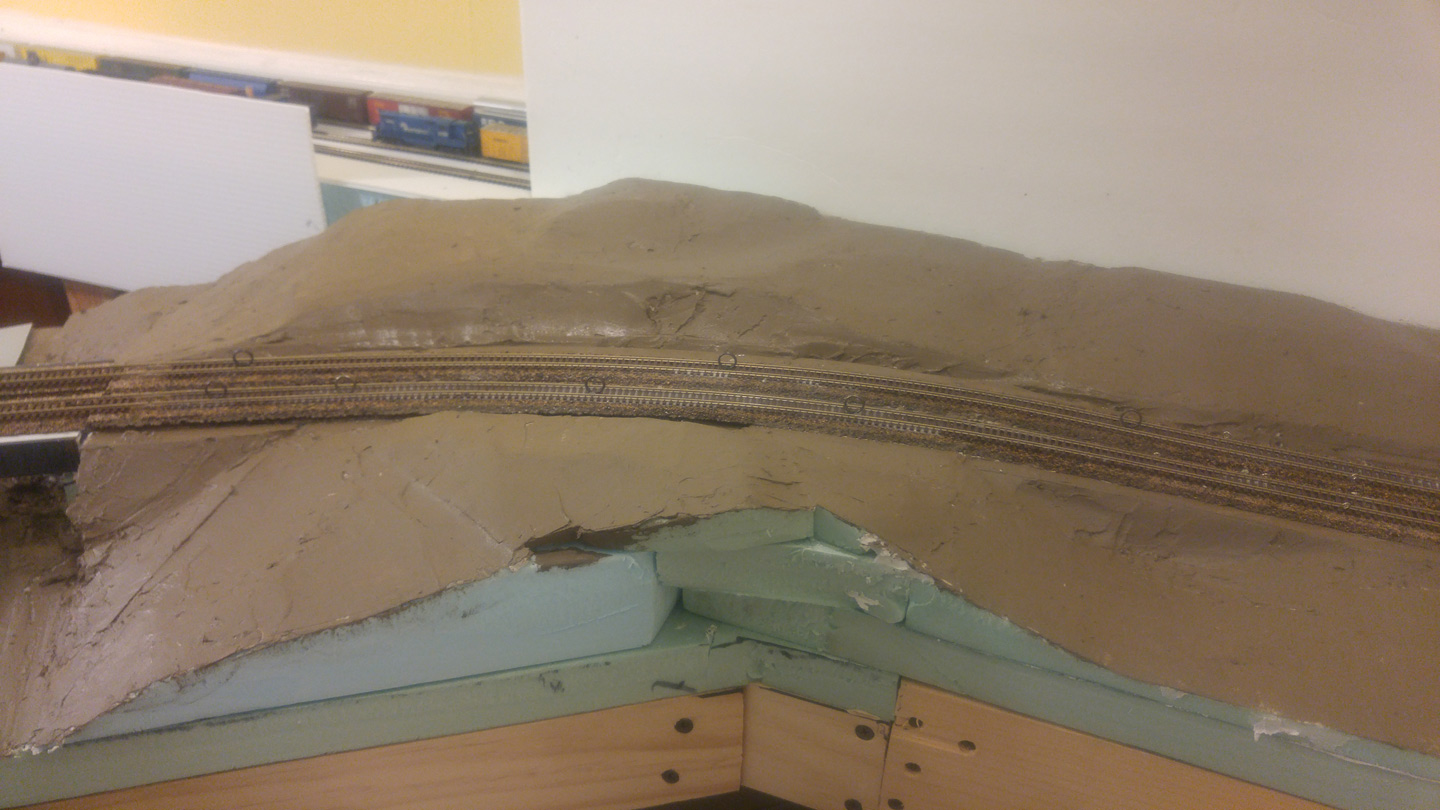
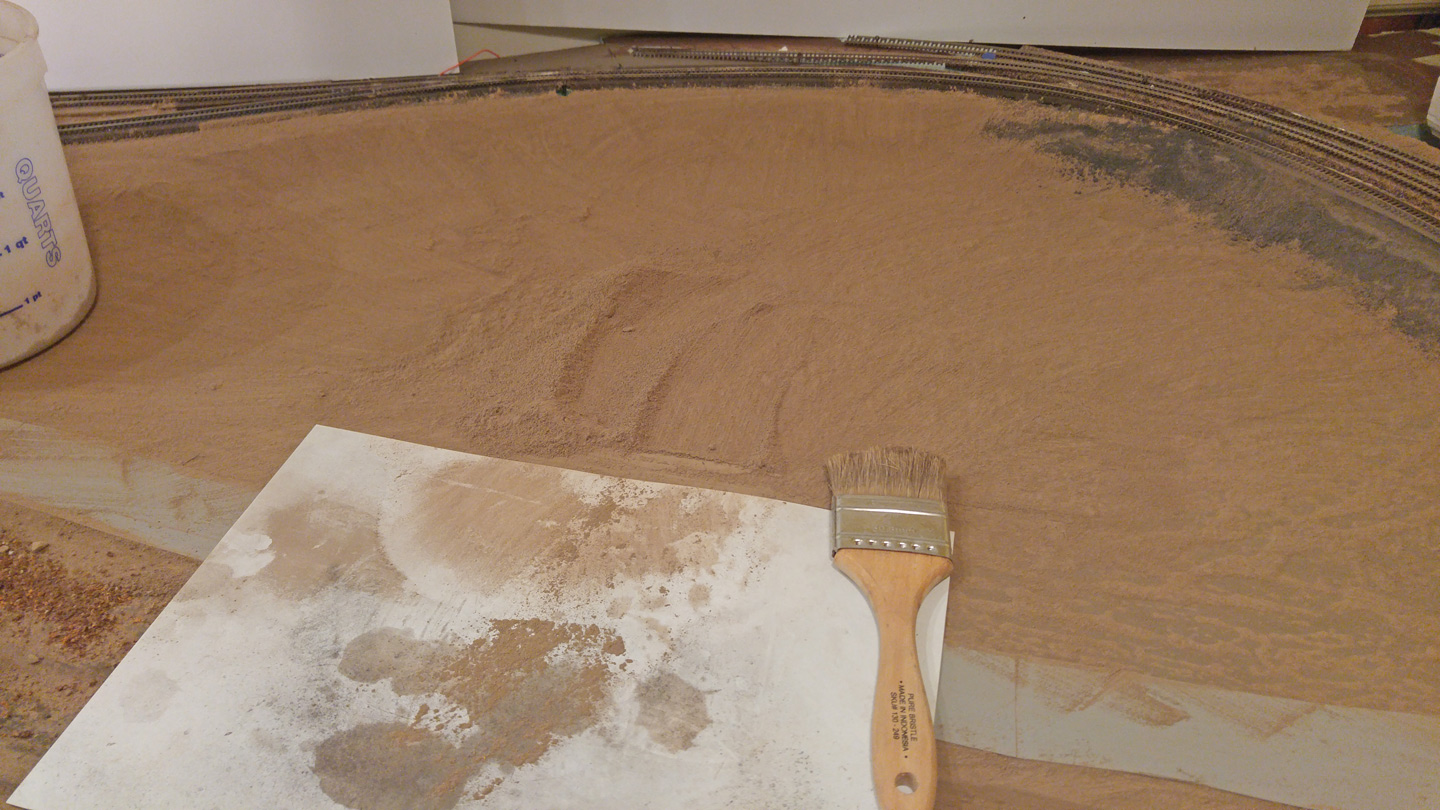
Lets start construction from the ground up. It starts with ground contours. An entire article could be written about this, but keep in mind that building scenery is like building a house, and quality scenery requires a quality foundation. The ground contours are that foundation. You can use any one of a number of techniquest for building your ground contours. Personally, I’m a big fan of carved extrured styrofoam (the pink, blue or green stuff, never the white stuff), covered in lightweight spackle. The important thing, though, is to make sure your contours are natural and properly scaled. Model railroaders often skip these things, with things like sheer cliffs, giant ruts, and other things that don’t look realistic. Modeling winter scenery means there is less greenery to cover up these types of things, so you have to pay extra special attention to them.
Once you’ve got your contours done, then paint them. I used to use cheap craft paint, but recently discovered that interior paint samples from Lowes or Home Depot are actually price competitive, and give you a much wider selection of colors. I chose “Treetrunk” from Valspar (because they’re a client of my current and past companies), but any similar dirt color will work. Because this is one of the places where we’re starting to care about color, I’ll start my drumbeat: work from photos. Find color photos of the area you want to replicate, and pick a paint color that matches the underlying dirt color you see (there’s a lot more of it than your mind’s eye might think there is).
After the paint dries, it’s time for dirt. A surprising amount of dirt shows through the layers above it, so choose wisely. While it’s possible to use dirt from the actual location your modeling (my father collects it and calls it “Sacred Soil”), I prefer to match the color using unsanded grout because it is much finer textured and doesn’t require the screening and other prep work. On my NCR layout, I’ve used pretty much straight “” from Lowes.
My technique for applying this is to brush some diluted white glue down on the layout, then sprinkle (or sift) on the grout. Do yourself a favor and try to make sure there aren’t any clumps in it.
Once the glue has dried, come back with a brush and a collection method (I like sheets of thin styrene) and brush off anything that hasn’t attached itself. You want a nice, thin, relatively smooth coat of the stuff. Keep scale and texture in mind when it comes to bumps or craters. You’re modeling the earth, not the moon.
If you need to, apply more to smooth over any still visible seems, crevasses, etc…
It’s not imperative to glue any additions down, since everything will be well soaked shortly.
With the dirt down, it’s time to start on the forest floor. It gets built up in layers.
My first layer is a decently thick layer of the Leaf Litter Superleaf. This forms the base of the scene. This material is very light, however, so it sometimes has a hard time adhering to sloped surfaces. In these cases, it’s helpful to spray the surface with some water to make it a bit sticker.
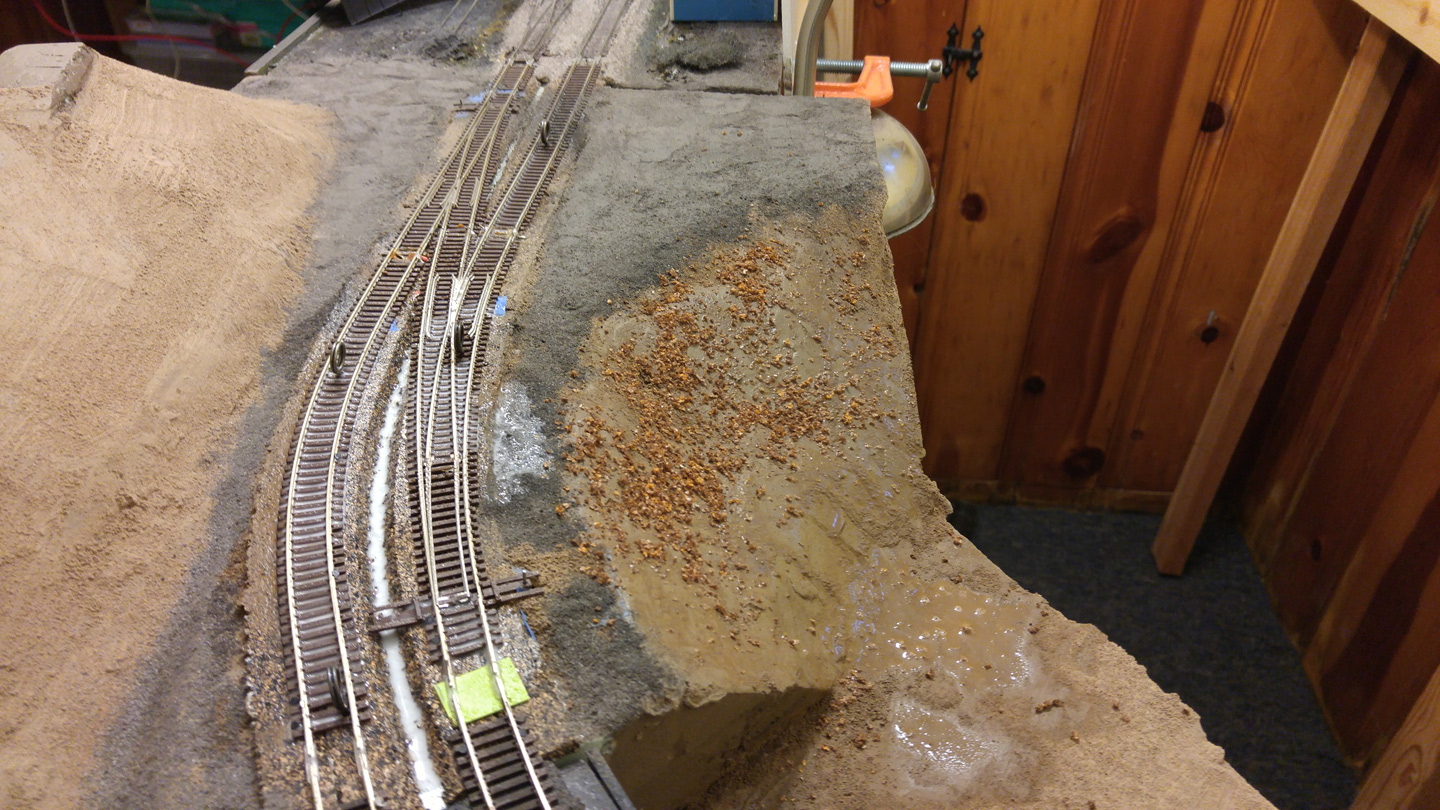
Because the Superleaf is a bit overscale, you’ll want to then toss on a light layer of the light brown turf. This evens things out and adds another texture and color into the mix.
Next up it’s time for some of the natural leaf material. I use this sparingly, but it does provide a nice amount of deadfall as well, so is worth it.
I then follow these up with various colors of fine or medium ground foam to simulate the growth that occurs on the forest floor. I generally use whatever’s laying around, but Woodland Scenics weeds and burnt grass seem to do a nice job.
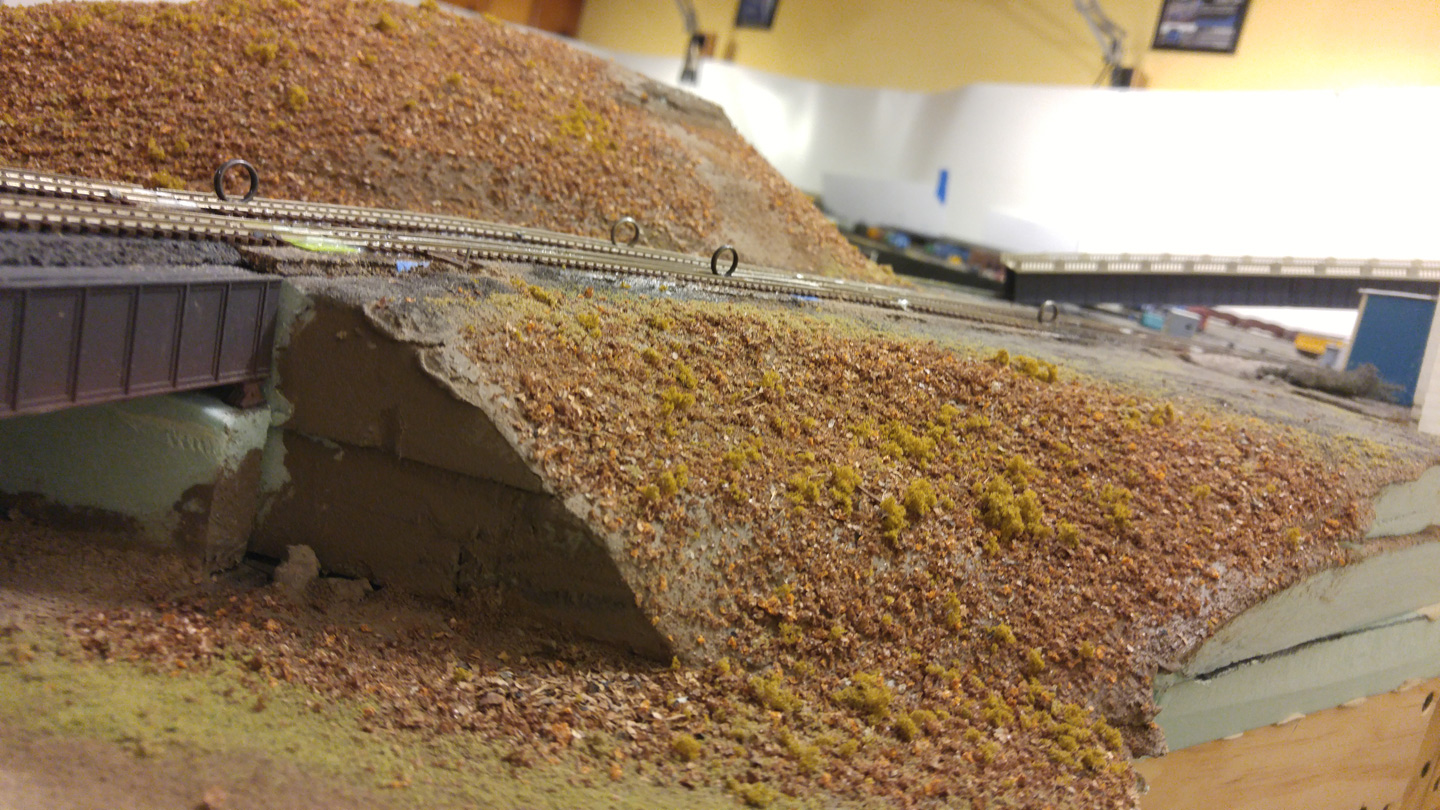
Once that cover is down, it’s time to glue things down. Spray everything gently with “wet water” (a mix of about 25% rubbing alcohol and water). Your spraying technique is important, however. Do not initially spray directly at your scenery. Instead, you need to spray above it and let the water gently fall. The force of the water coming out of the sprayer can disperse your scenery material if applied too directly. After things have gotten a bit damp, more direct spraying can be used, but be cautious.
When things are nice and wet, apply diluted white glue (25% glue in water) using a dropper bottle. An applicator bottle is perfect for this job, but eye droppers can work as well. The trick is to make sure that everything is decently wet with the glue mix, but you want to avoid puddles. You also want to be gentle while applying this as well, since the force of the mix coming out of the bottle, or falling onto the layout can easily displace material or cause erosion. Keep the applicator close to the material and work gently. If you’ve found that there may be too much glue and water mix, extra can be gently soaked up with a paper towel. Also, keep an eye on overflow: the run off of the mix from the edge of the layout onto the floor. I’ve successfully used paper towels pinned to the layout to stop leaks.
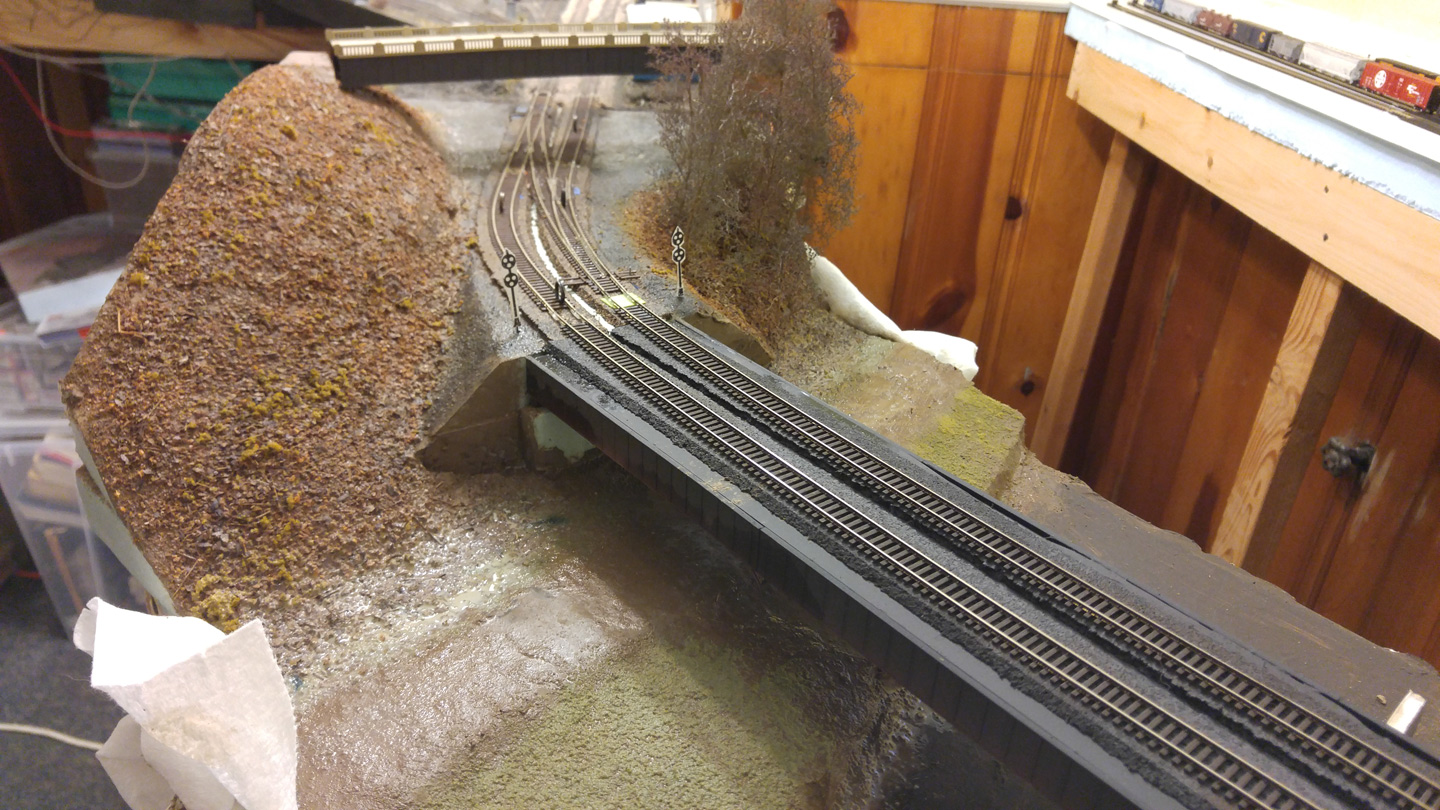
Once everything has dried, it’s time for trees.
Winter Trees
Trees may be the biggest challenge in modeling winter. Satisfactory results can be had with off-the-shelf products, however.
Materials
Gray, Dark Gray, Brown and Oxide Spray Paint
Technique
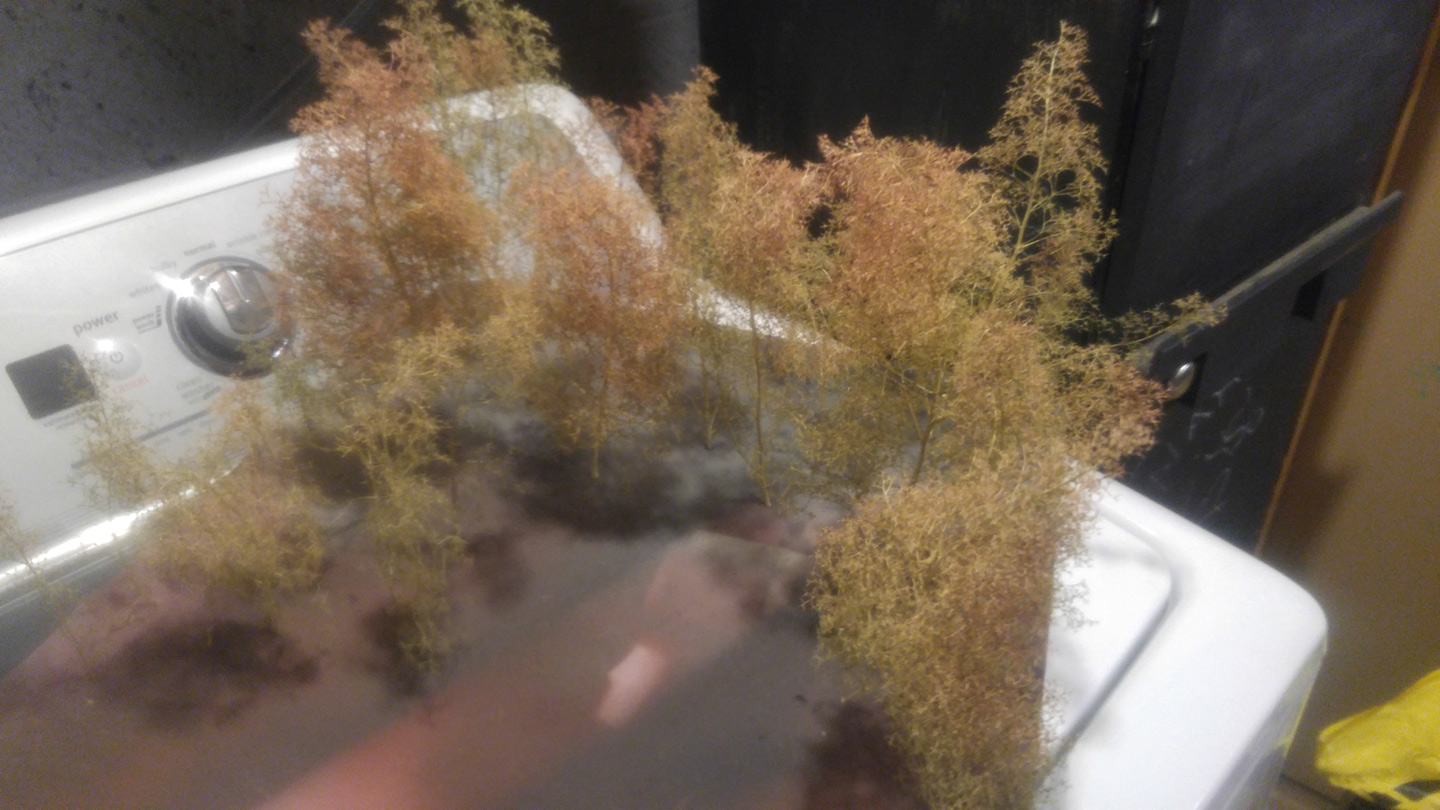
My tree technique is simple, but somewhat tedious. It involves finding the best looking armatures in your Supertree package and picking the small leaves off of them. This is the tedious part of the job. Make sure to select specimens that are appropriately sized for your use. Keep in mind that real trees are often significantly taller than most modelers make them. For more about winter trees, see my Winter Trees in N Scale article.
With your trees selected, plant them in some spare styrofoam, and paint them with the spray paint. Start with the grays, add a light bit of brown and finally dust with a little oxide.
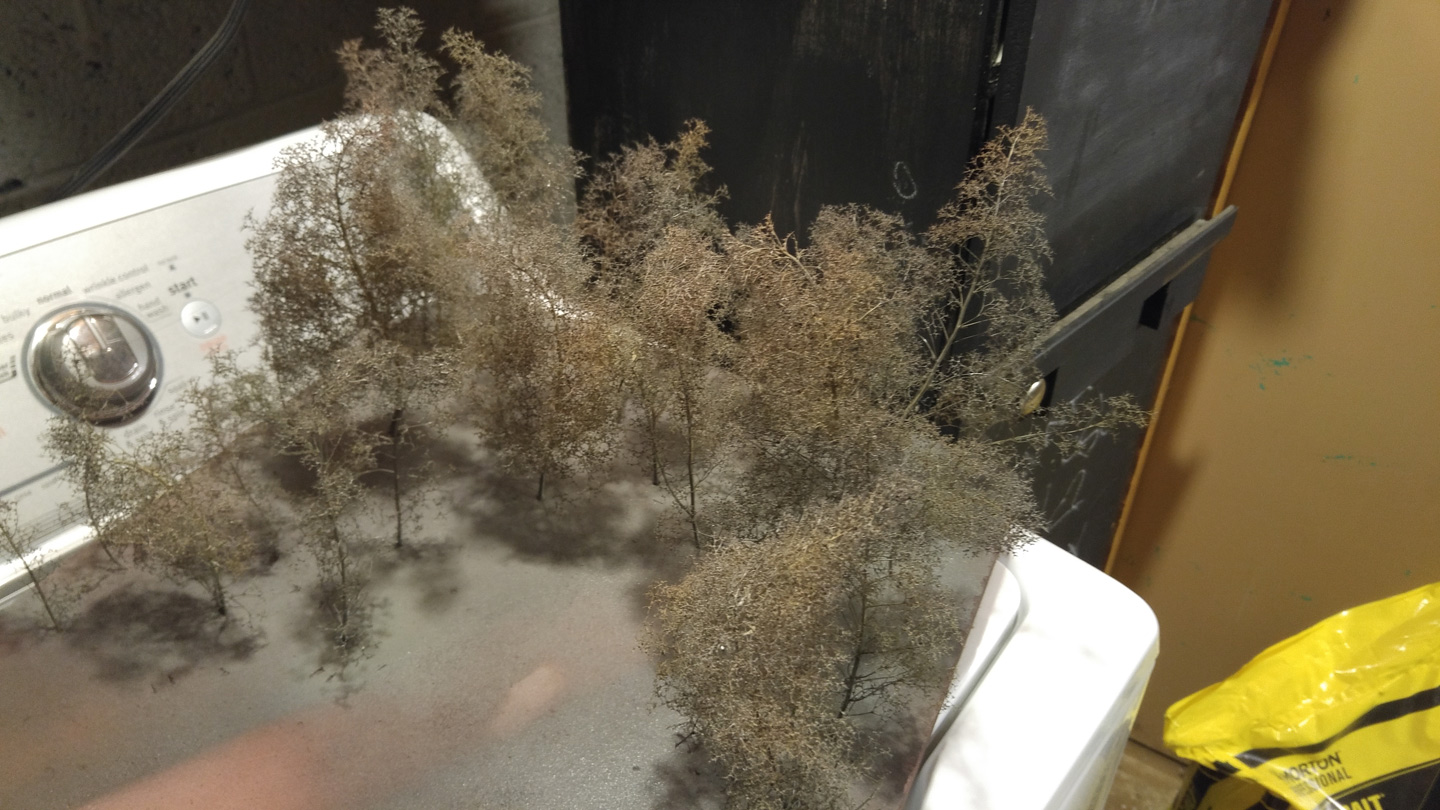
Once painted, it’s just a matter of poking some holes in your forest floor (I use some pointy tweezers), and sticking your trees in the holes and applying glue (if necessary).
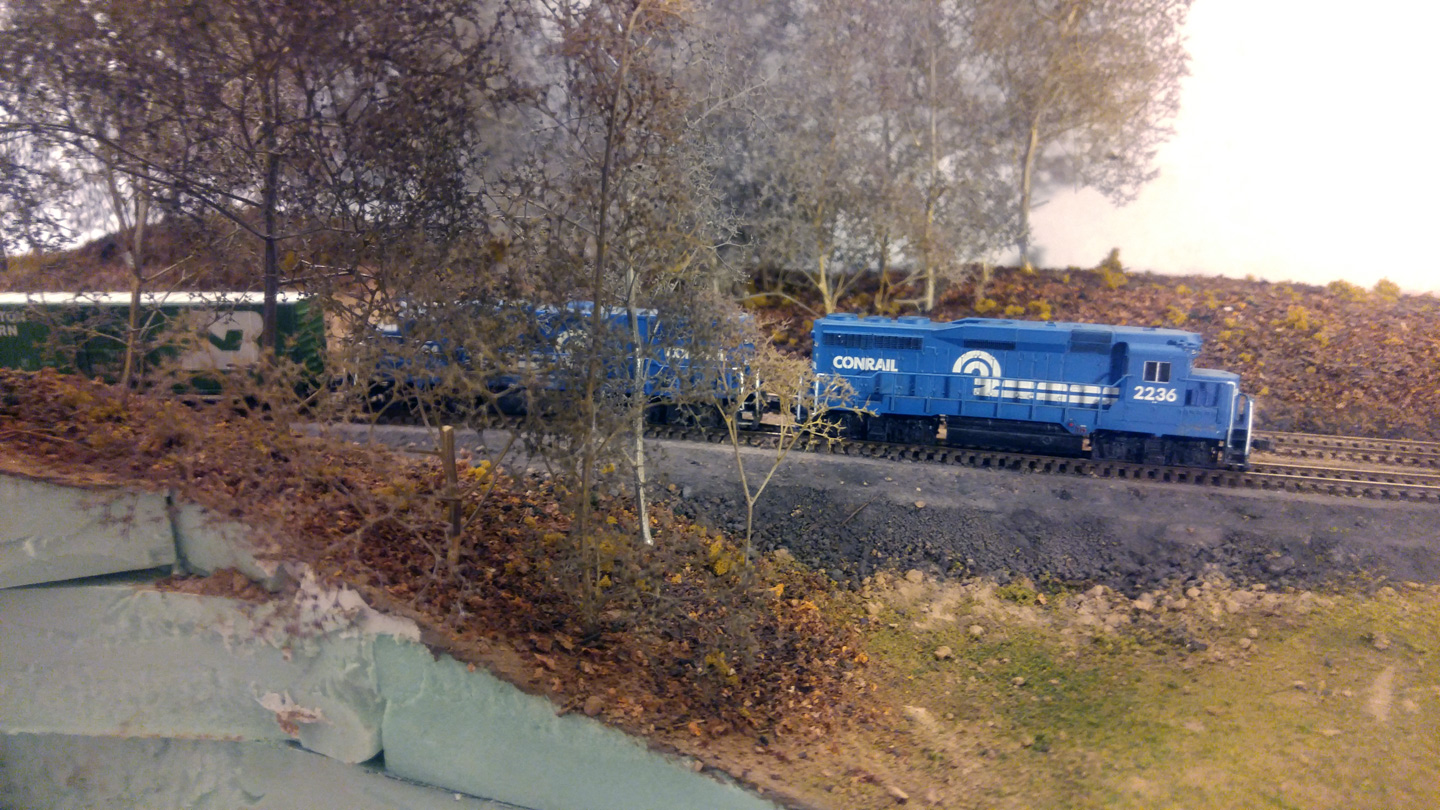
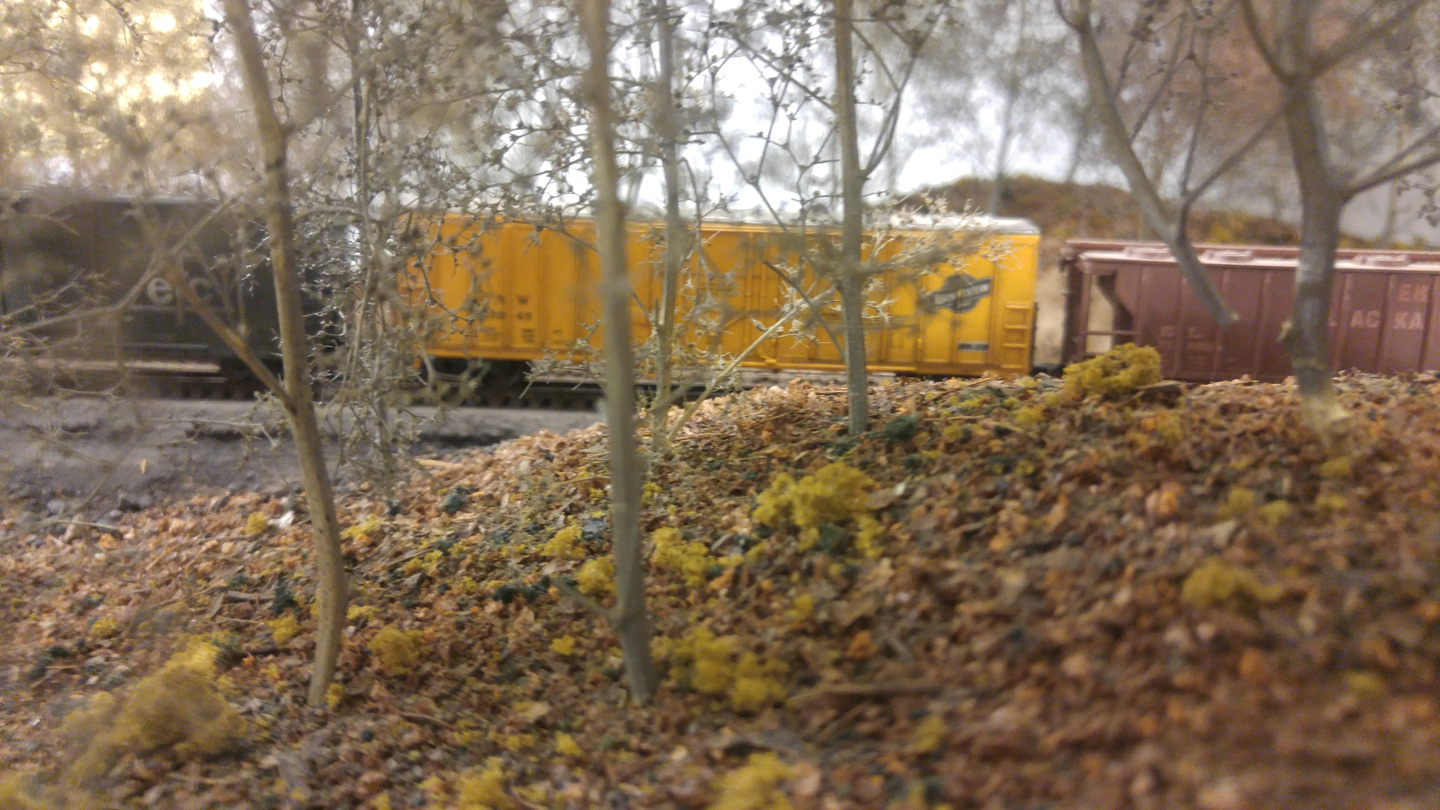
Here’s how a completed forest scene looks.

One thought on “Winter Forest Technique”
Comments are closed.